
By Jingong Pump Engineering Team
1. The Impeller Is the Heart of Your Pump — Don’t Wait for Total Failure
If your submersible pump is delivering weak pressure, making a gravelly rattling sound, or tripping the overload protector, the impeller is the first suspect. Not the motor. Not the cable. The impeller.
In a centrifugal submersible pump, the impeller converts rotational energy from the motor shaft into velocity and pressure. Over time, sand abrasion, fibrous entanglement, cavitation, and corrosive media erode the vane geometry. Once vane tips thin past ~1mm, efficiency drops 15–30%, forcing the motor to compensate with higher current—which is how you burn a stator.
This guide walks through standardized impeller replacement per Jingong factory SOP, adapted for our full range:
- Submersible Pumps (4″/6″/8″ deep well, sewage)
- Land Pumps (Centrifugal, Self-priming)
- Solar DC Pumps (Brushless PMSM)
- Gas/Diesel Pumps (Trash/Irrigation)
2. Signs You Need to Replace a Submersible Pump Impeller
Most buyers search for “submersible pump low pressure fix” at this stage. Here’s how to confirm before you pull the pump:
| # | Symptom | What It Means | Quick Verification |
|---|---|---|---|
| 1 | Low / Declining Pressure | Vane erosion → reduced head | Amp draw normal, but pressure low = impeller |
| 2 | Gravel/Rattling Noise | Chipped vane or trapped debris | Shut down and feel for vibration |
| 3 | Excessive Vibration | Impeller imbalance from uneven wear | Vibration travels up pipe |
| 4 | No Water (Motor Runs) | Impeller sheared off shaft | Amp draw *lower* than nameplate (no load) |
| 5 | Frequent Overload Trip | Debris forcing motor to lug | Amp draw *higher* than nameplate |
| 6 | Visual Corrosion/Blockage | Sand/fibrous wear | Pull pump and disassemble |
3. Pre-Replacement Preparation (Safety & Precision)
3.1 Safety First (Non-Negotiable)
Submersible work involves confined spaces, high voltage, water, and heavy lifting.
- Lockout / Tagout: Trip the dedicated breaker. Verify L1/L2/L3 are dead with a non-contact voltage tester. Tag the panel.
- Lifting Gear: Use a winch/tripod rated for 3× the pump weight (including water and pipe).
- PPE: Rubber insulated boots, gloves, safety goggles, and helmet.
3.2 Tool Checklist (Jingong SOP)
- Electrical: Non-contact voltage tester, multimeter, megger (insulation tester).
- Lifting: Winch/tripod, pipe wrench (48″), rope sling.
- Disassembly: Pipe wrench, Allen key set, impeller puller (2-jaw or 3-jaw), rubber mallet.
- Consumables: NEW O-rings, mechanical seal set, thread locker (Loctite 242).
3.3 Choosing the Right Replacement Impeller
Impellers are not universal. Matching the correct specs prevents premature failure.
- Model Number: Match your pump nameplate (e.g., JG-4SW-18).
- Shaft Diameter: Common sizes are 12.7mm, 14mm, 16mm.
- Material: See Section 8 for details (304 SS, 316 SS, PPO, Cast Iron).
- Stage Count: In multistage pumps, replacing one impeller often requires checking all stages for balance.
4. Step-by-Step Submersible Pump Impeller Replacement
Step 1: Power Cut & Pump Extraction
Trip the breaker and verify 0V. Disconnect wiring and unbolt the discharge pipe. Winch the pump up slowly, supporting the pipe every 2 meters to prevent kinking. Lay the pump horizontally on wood blocks.

Fig 1: Proper extraction technique using a tripod winch to protect the pump and piping.
Step 2: Housing Disassembly & Marking
Mark the pump orientation (motor vs. discharge) with a Sharpie. For multistage pumps, number each diffuser (1 to N). Unscrew the discharge head and remove the sand collar/strainer.
Step 3: Loosen the Impeller Nut (The Reverse Thread Trap)
This is the most common point of failure for DIYers. Most submersible impeller nuts use a LEFT-HAND THREAD (Reverse Thread).
| Pump Type | Nut Thread | To Loosen |
|---|---|---|
| 4″/6″/8″ Submersible | Left-Hand | Clockwise |
| Land Centrifugal | Right-Hand | Counter-Clockwise |
| Solar DC (Small) | Right-Hand | Counter-Clockwise |
Use a soft-jaw vise to secure the shaft. Apply penetrating oil if seized. Tap the nut sideways gently with a brass drift.
Step 4: Remove the Old Impeller
Once the nut is off, slide the impeller off. If stuck, use a 2-jaw puller hooked on the vane roots (never the tips). Inspect the shaft key for wear.
Step 5: Shaft & Cavity Cleaning
Wire-brush the shaft and clean diffuser bores. Blow out passages with compressed air. Crucially, inspect the mechanical seal. If the carbon face is cracked or the rubber is stiff, replace it now. 80% of “leaks after impeller change” are due to a skipped seal replacement.
Step 6: New Impeller Installation
Dry-fit the new impeller to check key engagement. Apply a light film of silicone grease to O-ring seats. Seat the impeller fully. Hand-start the nut (Counter-Clockwise to tighten on submersibles). Torque to spec:
- 4″ Submersible (JG-4SW): 18–22 N·m
- 6″/8″ Submersible: 28–32 N·m
Step 7: Reassembly & Seal Check
Stack diffusers in order. Slide the shell down, aligning your Sharpie marks. Torque clamps to spec. Perform a megger test (>5 MΩ) and a manual spin test before lowering the pump back into the well.
5. Special Notes for Different Pump Types
5.1 Submersible (Deep Well & Sewage)
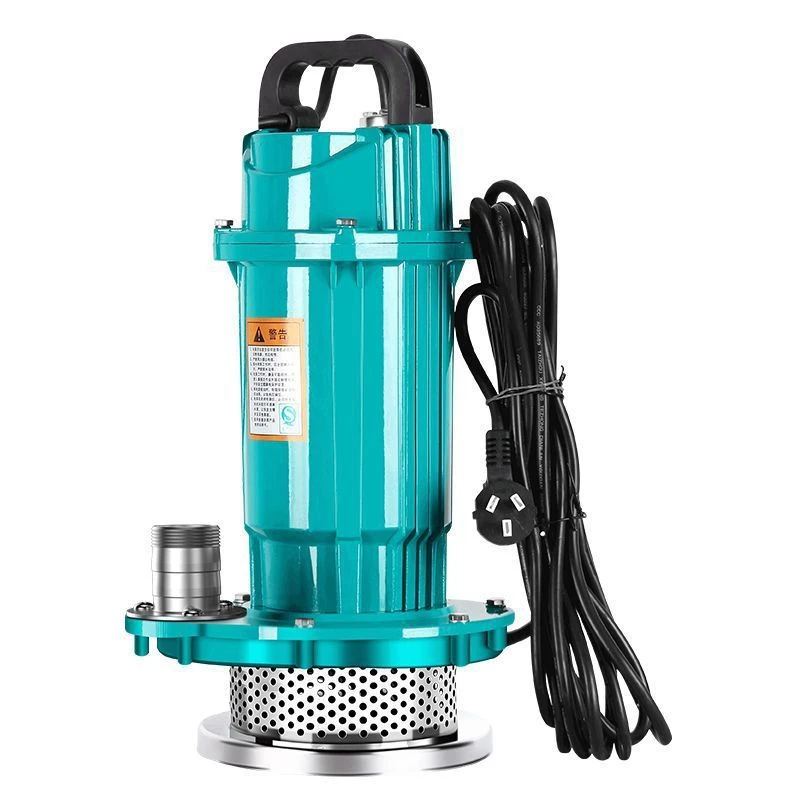
Deep Well: Ensure the sand collar mesh isn’t collapsed. Install a torque arrestor 3–5m below the well seal.
Sewage (JG-WQ Series): Check the oil chamber for a milky appearance (water ingress). Inspect the wear plate behind the impeller; if scored >1mm, replace it.
5.2 Land Pumps (Centrifugal/Self-Priming)

Re-align the motor coupling after reassembly (misalignment >0.1mm kills bearings). For self-priming pumps, ensure the priming chamber is refilled with water before restarting.
5.3 Solar Pumps (DC, Brushless PMSM)

Impellers are typically PPO/Noryl (lightweight). Do not overtighten set screws on plastic hubs. After replacement, verify the MPPT controller settings—a new impeller draws more startup current, potentially requiring a controller adjustment.
5.4 Gas/Diesel Pumps
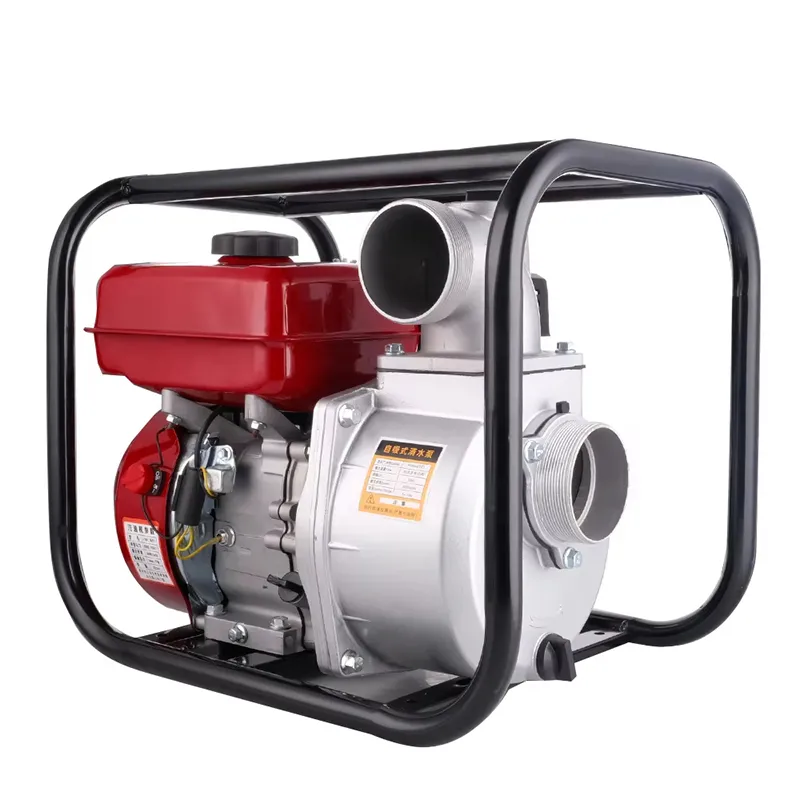
Check the keyway for shear (common with engine vibration). Inspect the priming chamber separator plate for flatness. Never run the engine with the discharge throttled closed for extended periods, as this can boil water inside the volute.
6. Post-Replacement Testing & Commissioning
Do not assume the job is done. Follow this checklist:
- Bench Test: Megger reading ≥ 5 MΩ. Windings balanced (±2%).
- Initial Start: Watch amp draw for the first 30 seconds. It should settle to nameplate ±10%.
- Performance: Verify flow and pressure against pre-failure baselines.
- Leak Check: Mechanical seals should weep no more than 1 drop per minute during operation.
7. Common Mistakes & Troubleshooting
| Mistake | Symptom | Solution |
|---|---|---|
| Wrong Nut Direction | Impeller backs off in hours | Remember: Submersible = Clockwise to loosen |
| Reusing Old Diffuser | Low pressure persists | Replace diffuser with impeller |
| Reusing Old Seal | Leaks after 3 days | Always replace the mechanical seal |
| Mixed Stages | Vibration/Bearing failure | Replace full stack or every other stage |
| Guessing Torque | Nut backs off or shaft stretches | Use a calibrated torque wrench |
8. Impeller Material & Selection Guide
Choosing the right material is critical for longevity and ROI.
| Material | Best Application | Avoid In | Jingong Series |
|---|---|---|---|
| PPO / Noryl | Solar DC, Clean Water | Hot water >60°C | JG-Solar |
| 304 Stainless Steel | Domestic Wells, Irrigation | Seawater (>200ppm Chloride) | JG-4SW Std |
| 316 Stainless Steel | Seawater, Mild Acids | High Abrasion Sand | JG-4SW-Marine |
| Cast Iron (HT200) | Land Pumps, Budget Irrigation | Potable Water (Rust) | JG-Land / JG-GD |
| SS316 + TC Ring | High-Abrasion Sand Wells | N/A | JG-4SW-HA |
9. Maintenance Tips to Extend Impeller Life
- Log Amps Annually: A 10% rise indicates wear.
- Install a Cyclone Desander: Essential for sandy wells; pays for itself quickly.
- Use VFDs: Reduces startup torque spikes that chip vanes.
- Proper Storage: Store spares in VCI paper to prevent corrosion.
10. Frequently Asked Questions (FAQ)
(Structured data for this section is in the page header to enable Google Rich Snippets.)
Q: How often should you replace a submersible pump impeller?
A: For clean well water (<5 ppm sand): 3–5 years. For sandy wells (20+ ppm): 12–18 months. For sewage: 6–12 months. Monitor amp draw; a 10% increase over nameplate is a key trigger.
Q: Can I replace the pump impeller by myself?
A: For shallow land or sewage pumps, yes, with basic mechanical skills. For deep-well submersibles, you need a winch rated 3x the pump weight and knowledge of reverse-thread nuts. If unsure about electrical safety (megger testing), consult a pro.
Q: Why is my new impeller pump still noisy?
A: Common causes include debris left in the volute, failing to replace the worn diffuser (leading to large vane clearance), or a failing motor bearing (not the impeller).
Q: Are solar pump impellers different from normal submersible pump impellers?
A: Yes. Solar impellers typically use lightweight PPO/Noryl material to reduce startup inertia for MPPT controllers. They also feature different vane geometry optimized for low RPM (600-1800) compared to AC submersibles (2850 RPM).
Q: How much does it cost to replace a submersible pump impeller?
A: Parts cost $25–$120 depending on material (PPO, SS304, SS316) and stages. Professional labor adds $150–$400. DIY saves on labor but requires proper tools. It is significantly cheaper than a full pump replacement ($400–$2000).
Need OEM Replacement Impellers or Technical Support?
Jingong Tech provides high-precision impeller replacement parts for Submersible, Solar, Land, and Gas/Diesel pumps. Contact our engineering team for custom sizing, material selection, and bulk distributor pricing.

0 Comments