
How to Install Water Booster Pump for Home Factory‑Grade Guide by Jingong Low water pressure is more than just an annoyance; it’s a critical failure in a home’s infrastructure that affects hygiene, appliance longevity, and daily comfort. As a leading manufacturer with over a decade of experience supplying water booster pumps for home use across global markets—from the high-rises of Europe to the off-grid homesteads in North America—we at Jingong Technology have seen every installation scenario imaginable.
This guide isn’t just a collection of generic steps. It is a comprehensive technical manual distilled from thousands of field installations. We will cover the nuances of installing Land Pumps, Submersible Pumps, Solar Pumps, and Gasoline/Diesel Pumps. Whether you are a seasoned plumber, a dedicated DIYer, or a homeowner looking to understand the process, this guide provides the authoritative insights you need to ensure a safe, efficient, and long-lasting installation.
Chapter 1: Understanding Home Water Booster Pumps & Types
1.1 What is a Water Booster Pump?
A water booster pump is a mechanical device designed to increase the pressure and flow of water within a plumbing system. In technical terms, it converts rotational kinetic energy (from a motor) into hydrodynamic energy. For homes, this means overcoming frictional losses in pipes, elevation changes (head), and insufficient municipal supply pressure.
1.2 Why Pressure Drops Occur (The Physics)
Before installing a home water booster pump, understanding the root cause is crucial:
- Frictional Loss: Water moving through pipes encounters resistance. The longer the pipe and the smaller the diameter, the greater the loss.
- Static Head: Gravity works against you. Every 10 feet of vertical rise reduces pressure by approximately 4.33 PSI.
- Simultaneous Demand: Using a dishwasher, shower, and garden hose simultaneously divides the available flow, resulting in pressure drops.
1.3 Jingong’s Core Product Lines for Residential Use
As a factory-direct manufacturer, we categorize our residential boosters based on application and power source. Each requires a slightly different approach to installation.
A. Land Booster Pumps (Surface Pumps)
These are installed above ground (basements, utility rooms). They are ideal for boosting municipal water pressure or drawing water from shallow wells/cisterns.
Installation Trait: Requires priming (filling with water) before startup. Must be protected from freezing.
Explore Jingong Land Booster Pumps
B. Submersible Booster Pumps
Designed to operate underwater, typically inside a well or storage tank. They push water upward rather than sucking it.
Installation Trait: Requires secure rope/chain attachment (never lift by the cable). Must be fully submerged to prevent overheating.
View Jingong Submersible Pumps
C. Solar Water Booster Pumps
Powered by photovoltaic panels, these are perfect for off-grid homes, remote cabins, or areas with unreliable electricity.
Installation Trait: Requires careful alignment of solar arrays and proper MPPT controller configuration.
Shop Solar Water Pumps
D. Gasoline & Diesel Booster Pumps
Internal combustion engine-driven pumps used for emergency backup during power outages or in locations without electricity.
Installation Trait: Requires ventilation (carbon monoxide risk) and fuel management. Not for indoor use.
Browse Engine Driven Pumps
Chapter 2: Do You Really Need Water Booster Pump for Home?
Installing a pump where it isn’t needed can lead to burst pipes. Here is the Jingong Diagnostic Protocol.
2.1 Measuring Your Current Pressure
You need a pressure gauge ($10 at any hardware store).
- Attach it to a hose bib (outside spigot) or washing machine connection.
- Ensure no water is running in the house. Turn on the valve.
- Read the PSI (Pounds per Square Inch).
Industry Standards:
- < 40 PSI: Low pressure (Needs a booster).
- 40-60 PSI: Ideal range.
- > 80 PSI: Too high (Requires a Pressure Reducing Valve, PRV, not a booster).
2.2 Scenario Analysis: Which Pump Do You Need?
| Symptom | Likely Cause | Recommended Jingong Pump |
|---|---|---|
| Weak shower on 2nd floor | High static head | Land Booster Pump |
| Slow well recovery | Low yield / Long pipe run | Submersible Booster Pump |
| No city power / Remote cabin | Lack of electricity | Solar Water Booster Pump |
| Frequent blackouts | Power unreliability | Gasoline/Diesel Pump |
Chapter 3: Water Booster Pump for Home Pre-Installation: Tools & Safety Checklist
Safety is paramount. At Jingong, we adhere to strict ISO standards. Before touching a wrench, review this checklist.
3.1 Tools Required
- Pipe Wrenches (2 sizes)
- Adjustable Wrench
- Teflon Tape (Plumber’s Tape)
- Pipe Thread Sealant (Dope)
- Tubing Cutter or Hacksaw
- Voltage Tester (Non-contact)
- Screwdrivers (Phillips & Flathead)
- Drill with bits (for mounting)
- Hose clamps
- Bucket and rags
3.2 Parts & Fittings
- Check Valve: CRITICAL. Prevents backflow and water hammer.
- Pressure Tank (Optional but recommended): Reduces pump cycling.
- Pressure Gauge: For monitoring output.
- Ball Valves: Upstream and downstream of the pump for isolation.
- Union Fittings: Allows easy removal of the pump for service.
- Suction Strainer/Foot Valve: For submersible and land pumps to prevent debris ingestion.
3.3 Safety Protocols (Compliance)
- Lockout/Tagout (LOTO): Shut off the main water supply and the electrical breaker. Verify with a tester.
- Depressurize: Open the lowest faucet in the house to drain residual pressure.
- Electrical Safety: All connections must be grounded (Earth). Use a GFCI (Ground Fault Circuit Interrupter) outlet.
- Ventilation: Never run gasoline/diesel pumps indoors due to CO poisoning risk.
Chapter 4: Water Booster Pump for Home Universal Installation Principles
Regardless of the pump type, these principles apply to every water booster pump installation for home.
4.1 Location Selection
- Accessibility: Easy access for maintenance.
- Temperature: Protect from freezing (below 32°F/0°C).
- Foundation: Must be level and rigid. A vibrating pump on a soft surface will fail prematurely.
- Proximity: Keep suction lines short and direct to minimize friction loss (“Net Positive Suction Head” – NPSH).
4.2 Piping Best Practices
- Use Proper Materials: PEX, Copper, or Schedule 80 PVC. Avoid thin-walled pipes.
- Support Pipes: Use hangers/clamps. Don’t let the pipe weight stress the pump fittings.
- Seal Threads Correctly: Wrap Teflon tape clockwise. Apply sealant. Overtightening cracks fittings; undertightening causes leaks.
4.3 Priming (For Land Pumps)
Most surface pumps are not self-priming beyond a few feet.
- Remove the priming plug on the pump casing.
- Pour water slowly until it overflows.
- Replace the plug tightly.
- This removes air locks that prevent suction.
Chapter 5: Water Booster Pump for Home Step-by-Step: Installing Different Pump Types
This is the core of our guide. We break down the specific steps for each Jingong product line.
5.1 Installing a Land Booster Pump (Surface)
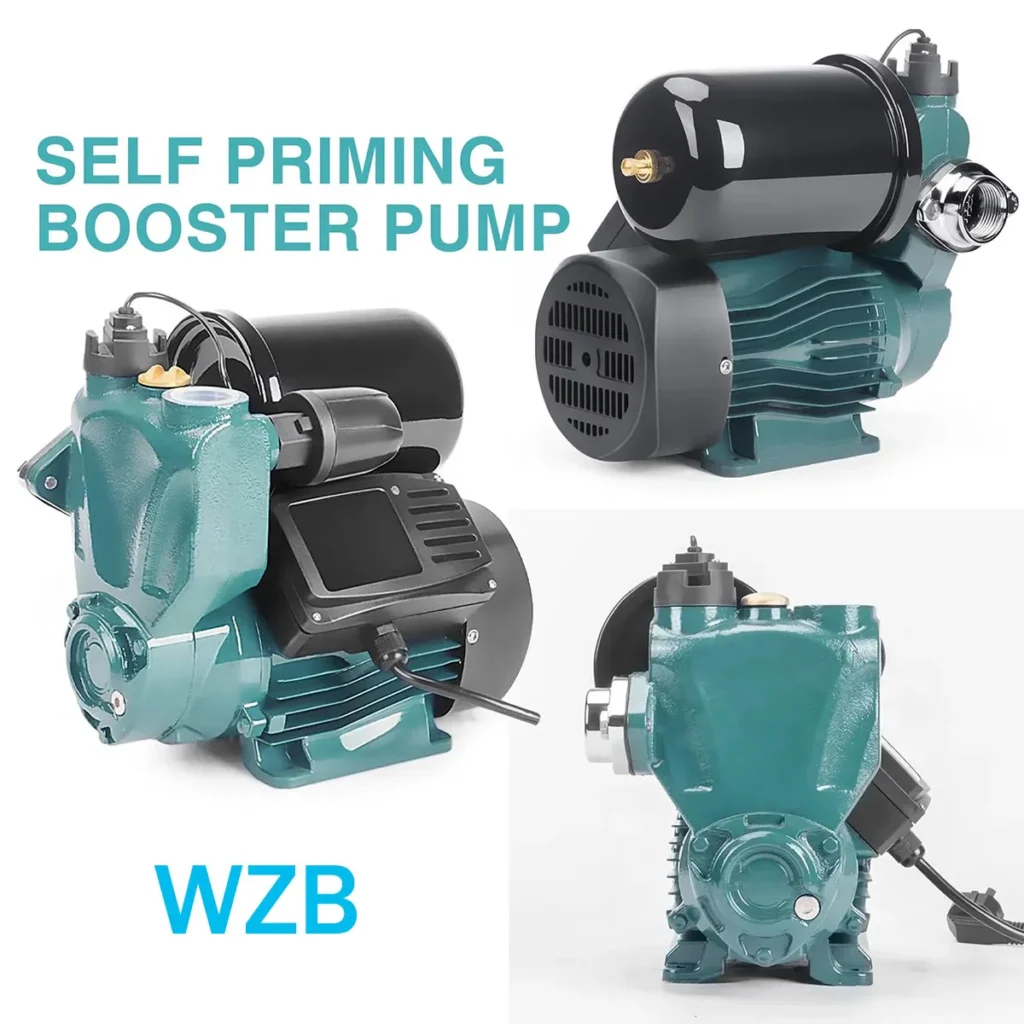
Best for: Indoor plumbing, boosting city water.
- Mounting: Secure the pump to a concrete pad or wall bracket using vibration-dampening mounts (rubber feet).
- Suction Side (Inlet): Install a Foot Valve (check valve) at the end of the suction pipe, submerged in the water source. Use a Strainer. Keep the pipe rising continuously to the pump (no dips).
- Discharge Side (Outlet): Install a Pressure Relief Valve (set slightly above max operating pressure). Install a Pressure Gauge. Install a Check Valve immediately after the pump to prevent backflow.
- Wiring: Connect to a dedicated circuit. Ensure correct voltage (110V/220V). Ground the unit.
- Priming: Follow the priming steps in Chapter 4.
- Testing: Open a nearby faucet, turn on power. Watch the gauge. Air pockets may cause sputtering initially.
Anchor Text for Outreach: surface water pump installation guide
5.2 Installing a Submersible Pump

Best for: Deep wells, underground cisterns.
- Preparation: Test fit the pump and piping in the open area near the well.
- Rope Attachment: Tie a safety rope (nylon or stainless steel cable) to the pump’s designated eyebolt. Never use the power cord for lifting.
- Check Valve Stacking: Install check valves on the discharge pipe according to the pump’s manual (usually every 100ft for deep wells).
- Lowering: Slowly lower the pump into the well. Do not drop it. Keep the pipe straight to avoid kinks.
- Torque Arrestor: Install a torque arrestor above the pump to prevent spinning when the pump starts/stops.
- Well Seal: Secure the well cap/seal. Ensure the vent is not blocked.
- Wiring: Wire the pump to the control box (if applicable) and then to the pressure switch. Use waterproof wire connectors (heat shrink).
- Final Check: Ensure the pump is submerged at least 10ft below the static water level but at least 10ft above the well bottom (to avoid silt).
5.3 Installing a Water Booster Pump
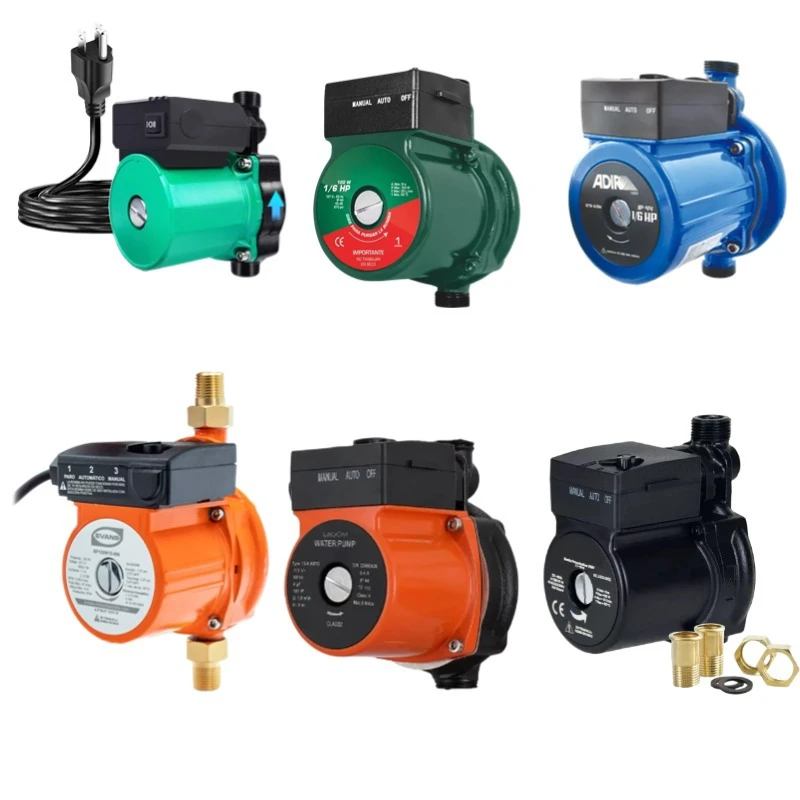
Best for: Off-grid homes, farms, RVs.
- Solar Panel Mounting: Install panels facing true South (Northern Hemisphere) or true North (Southern Hemisphere) at the optimal tilt angle (usually latitude +/- 15 degrees).
- Controller Placement: Mount the MPPT (Maximum Power Point Tracking) controller in a cool, dry, ventilated location.
- Pump Connection: Connect the pump to the controller’s output terminals.
- Panel Connection: Connect the solar array to the controller’s input terminals. Observe polarity strictly (+/-).
- Battery Backup (Optional): If using batteries, connect them to the controller’s battery terminals.
- Water Line: Connect the pump inlet to the water source and the outlet to the pressure line. Ensure the inlet has a strainer.
- Commissioning: Cover the panels or wait for full sun. The controller should initialize, detect the pump, and start softly. Monitor the voltage and current readings on the controller display.
5.4 Installing a Gasoline/Diesel Pump
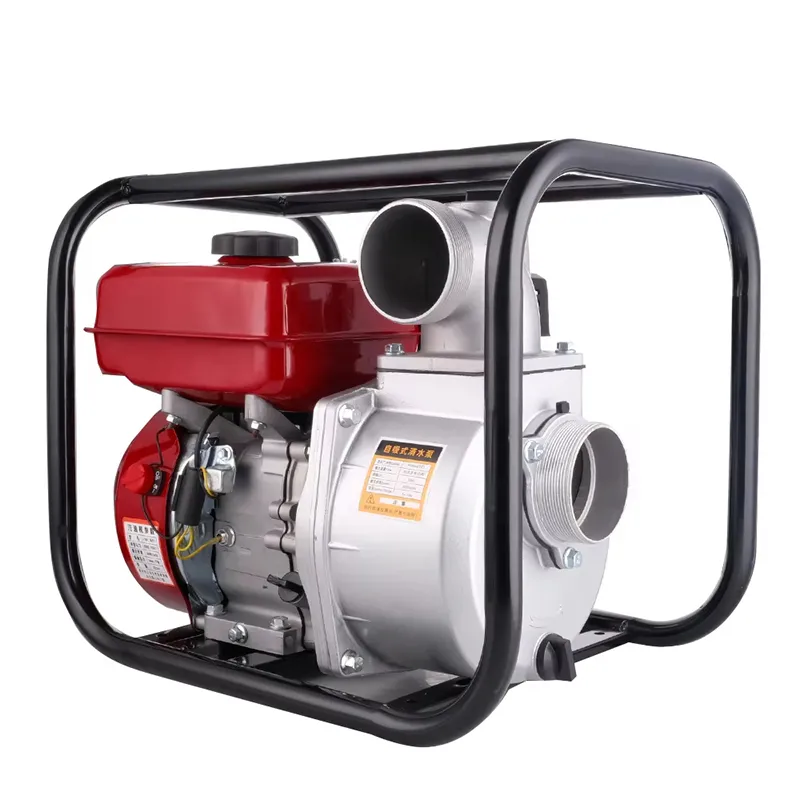
Best for: Emergency, construction sites, temporary use.
- Site Prep: Choose a flat, stable surface outdoors. Clear away dry grass or flammable materials.
- Fueling: Add fresh, clean fuel. Check the oil level (4-stroke engines).
- Intake Hose: Attach a heavy-duty suction hose with a foot valve and strainer. Ensure all clamps are tight.
- Discharge Hose: Attach the outlet hose to your destination (e.g., house inlet or storage tank).
- Priming: Most engine pumps require filling the pump casing with water via a priming port before starting.
- Starting: Set the choke, pull the starter cord (or use electric start). Once running, gradually open the choke.
- Monitoring: Never leave the pump unattended. Refuel only when the engine is cool.
Warning: These pumps are NOT for indoor use due to Carbon Monoxide (CO) risk.
Chapter 6: Water Booster Pump for Home Commissioning & Pressure Calibration
Installation is complete, but the job isn’t done until the system is calibrated.
6.1 Setting the Cut-In/Cut-Out Pressure
Most home booster pumps use a pressure switch (e.g., 30/50 or 40/60).
- Cut-in: The pressure at which the pump turns ON (e.g., 30 PSI).
- Cut-out: The pressure at which the pump turns OFF (e.g., 50 PSI).
Adjustment:
- Locate the spring nuts on the pressure switch.
- Turning the large nut adjusts the cut-out pressure (range).
- Turning the small nut adjusts the cut-in pressure (differential).
- Rule of Thumb: Maintain a 20 PSI differential (e.g., 40/60) to prevent rapid cycling.
6.2 Air Charge in Pressure Tank
If you have a pressure tank, check its air charge (Schrader valve) with a tire gauge. It should be 2 PSI below the cut-in pressure. (e.g., If cut-in is 40 PSI, air charge should be 38 PSI). This ensures the bladder functions correctly.
6.3 Checking for Leaks and Vibration
Run the system for 15 minutes. Check every joint with a tissue paper—if it flutters, there’s a leak. Feel for excessive vibration; if present, check mounting bolts and consider adding a vibration pad.
Chapter 7: Water Booster Pump for Home Troubleshooting Common Issues
Even with a perfect installation, issues can arise. Here are solutions based on Jingong’s technical support logs.
7.1 Pump Runs But No Water (Loss of Prime)
Cause: Air leak in suction line or failed foot valve.
Fix: Tighten all suction fittings. Replace the foot valve. Re-prime the pump.
7.2 Pump Cycles Too Frequently (Short Cycling)
Cause: Waterlogged pressure tank or leaky fixture.
Fix: Check tank air charge. If water comes out of the Schrader valve, the bladder is ruptured—replace the tank. Check toilets for running water.
7.3 Low Pressure / Low Flow
Cause: Clogged impeller, clogged filter, or undersized piping.
Fix: Clean the inlet strainer. Disassemble the pump to check for debris in the impeller (ensure power is off!). Verify pipe diameter matches pump specs.
7.4 Excessive Noise/Vibration
Cause: Cavitation (pump starving for water), worn bearings, or loose mounting.
Fix: Increase suction pipe size. Reduce suction lift height. Tighten mounting bolts. Replace worn parts.
Chapter 8: Water Booster Pump for Home Maintenance for Longevity
A well-maintained Jingong pump lasts decades.
8.1 Monthly Checks
- Listen for unusual noises.
- Check for leaks around seals.
- Verify pressure gauge readings.
8.2 Quarterly Checks
- Inspect electrical connections for corrosion.
- Clean the inlet strainer/filter.
- Check the pressure tank air charge.
8.3 Annual Overhaul
- Land Pumps: Lubricate bearings if applicable. Replace mechanical seals if leaking.
- Submersible Pumps: Test amp draw (high amps indicate wear). Check well water level.
- Solar Pumps: Clean solar panels. Check controller error codes. Inspect wire insulation for UV damage.
- Engine Pumps: Change oil. Clean spark plug. Drain fuel if storing for winter.
Chapter 10: Conclusion: Your Trusted Partner in Water Solutions
Installing a water booster pump for home is a significant upgrade to your property’s infrastructure. As we’ve detailed, the process varies significantly depending on whether you choose a Land Pump, Submersible Pump, Solar Pump, or Gasoline/Diesel Pump.
At Jingong Technology, we don’t just manufacture pumps; we engineer solutions. Our factory-direct model ensures you receive industrial-grade quality at competitive prices, backed by a team of engineers who understand the nuances of global water systems.
Whether you need to conquer low pressure in a high-rise apartment or establish a reliable water supply in an off-grid location, Jingong has the expertise and the equipment to deliver.
Ready to select the right pump?
Browse Jingong Residential Pumps Now | Contact Our Technical Team

0 Comments